Sunday, 13 September 2009

Tomato and Sweetcorn Soup (by accident!)


What to do with the last three bowls of ripe tomatoes, which have been sitting in the awning for several days and need to be done something with otherwise they will end up on the compost heap. I was going to have a go at bottling them in kilner jars but decided against that project because of the smallness of the caravan kitchen. So: two bowls when into another batch of tomato chutney, which I can eat by the potful quite easily. I am addicted to this chutney. Totally! That left the last bowl.

Lunchtime was looming. Didn't feel like cooking, so: soup. I don't really make a good soup as yet, although am improving. I know I am improving because Hubs asks for a second bowl. If it's not so good he doesn't. Of course he will always say that it is nice anyway, but one bowl: soup not really that good. Two bowls, and it's great!

Have tried following a recipe for tomato soup before, and it turned out feeling slimy on the tongue so I couldn't eat it. That was cream of tomato, made with proper cream as well, so was a bit of a waste. Down the sink it went. That was when I was living in the UK. At least here everything goes out onto the compost heap where all manner of wildlife partake of the food which is put there.

I couldn't be bothered to search out a recipe, and here is what I did:

Took all the remaining tomatoes (probably about 2lb) and skinned them. Into pot they went, together with a chopped onion, 1 herb stock cube, salt to taste, good teaspoon of brown sugar because Val up in the Charente said that salt and sugar help keep the colour of tomatoes, but it doesn't matter if they don't because I like the way salt and sugar combine to give food a sweet and sour taste.

It was on my mind to grate a couple of garlic pods (is that what you call a piece of garlic?) but couldn't be bothered.

To stop the tomatoes from burning, I added about quarter of a pint of water: not much, just to moisten the surface of the pan.

Onto the stove, up to boil, then simmered for about 30 minutes or so, just enough time for me to go and harvest some amaranth seed from the veg plot.

Off heat for a moment while I scrabbled about in the underseat storage area of the caravan for my blender, then tomatoes into blender, lid on (?), and toms juiced. It didn't take a huge amount of time to clean up the tomato splash, and perhaps my eagerness to get on with the day was my undoing because I was not alert enough to the position of the lid. Not to worry, everything is a learning curve in life, and next time I will know to make sure the lid is on properly. I did make quite a mess because red liquid spurted up and went everywhere, including over me.

But the good news is, that there was still enough left in the blender to carry on with the soup making, although I had to add a bit more water to bulk up the quantity of liquid.


I wasn't going to bother de-seeding the soup, but changed my mind after a test-spoonful left my mouth full of seeds. So soup into sieve, massaged it round with a spoon to encourage the liquid to fall through into the pot below, which eventually left a surprising amount of residue behind in the sieve.

I was actually getting quite messy by now, what with the blender lid incident, and the mashing of the soup through the sieve. Not to worry though, I remind myself that this is a caravan I am cooking in, so I forgive myself and carry on boldly.

Ooohhh. And now into the fridge for the Creme Fraiche. On yummy yums!

Now to test that the pot is still fresh, I do feel that I ought to have a taste. Or two. And what about the cream still left on the lid? Mustn't waste that!

Just to prove that it was only a little bit of creme fraiche I tasted!

Back to the soup: brought pan back to heat, added good 2 - 3 tablespoons of creme fraiche. Kept stirring while soup heated back up. Opened a tin of what I thought was haricot beans, but it turned out to be sweetcorn. Not to worry though: put them into the soup anyway!

Et voila! The proof was in the eating: Hubs not only came back for a second helping, but emptied the pot!


PS. A piece of garlic is called a 'clove'. It came into my mind a minute ago!

Wednesday, 26 August 2009

Beetroot: to roast or pickle?

Finally it was time to go start raiding our small row of beetroot, left to fend for itself over the summer months, rarely watered, and quite frankly, neglected so I didn't have much hope for a good harvest. Much to my surprise, out of a quarter of the row I managed to get a small haul of veg, all of various size, from tiny to medium. (Tiny because they had been squashed up against the bigger beetroot and so couldn't grow- I have a dislike of thinning veg out!)

So what to do with them: pickle them perhaps? But I didn't feel like doing that because of the various sizes, then I remembered a conversation with a friend of mine who said she had roasted them and they were delish. A quick search on the Internet fetched up with three suggestions, from which I chose my method.

Here is what I did:
1) As per Red Kitchen's suggestion (see Recipe 1 down below), after first removing the tops I peeled the beetroot with a potato peeler but had on rubber gloves to protect my hands. I also had on a pinny to stop my clothes from being splashed with beetroot juice, - I am messy when cooking!

2) Still with Red Kitchen: I cut them into chunks, 'splashing them with olive oil and red wine vinegar, plus salt and pepper'. Then into my Ramoska, which is a table top cooker.

3) Inspired by Recipe 2 from bbc.co.uk: I rummaged around in the bottom of my onion box and found some small red onions and a couple of small white onions. These I peeled. Out into the garden for some small pieces of thyme, I rubbed the leaves off the stems. All into the Ramoska. I forgot to put in the garlic as suggested, but did add of my own accord three small carrots (our first carrot harvest!) and a two medium sized potatoes which I peeled and cut into chunks. Into the Romaska these went.


And with a thrill I observed these veg, because they had all come from our garden!

Anyway, a quick roll round to coat the veg with olive oil and seasonings, then on went the lid of the Ramoska.

An hour later and voila!


Sorry, but we ate the roasted veg up before I could take a photo! But crikey! It was gorgeous! In fact it is unlikely that I will bother with pickling beetroot unless we have a glut, which I suppose we could have had this year if we had paid more attention to the beetroot when it was growing. But, hey ho! We are in our first year of self sufficiency so perhaps next year we will have sufficient left over for me to do some pickling.

Oh and by the way, I served the veg up with Chickpea Patties.

And here are the recipes which contributed to my learning curve about how to roast beetroot:

Recipe 1: Roasted beetroot.

- Take some fresh beetroots, preferrably from some loved one's garden, scrub the dirt off them and discard the leaves and stalks.
- Peel them and watch your fingers turn an attractive pink.
- Chop into manageble chunks (this is dictated a little by what you will be eating them with - a roast that will be a long time in the oven: big chunks which won't burn with the longer cookign time; want a roasted beet fix in a hurry: small chunks etc etc).
- Splash with olive oil and some vinegar-esque type stuff: I use red wine vinegar, because it has a clearer taste that the caramelly balsamic. Shallot vinegar would be good, too. Toss chunks and add a light sprinkle of salt and pepper.
- Bung the dish in the oven and roast the buggery out of it (a medium to hot oven) until cooked (try piercing one with a sharp knife). But don't let them burn!
- Excellent with roasts, in fritattas etc but also good in a mixed salad. Don't forget how spectacularly well beetroot goes with goats' cheese, so a leafy green salad with beetroot and goat's cheese is pretty luscious.

PS. Don't be alarmed by the *ahem* aftermath of eating a lot of beetroot at once - it tends to be same colour going out as it is going in : )

http://kitschenette.typepad.com/redkitchen/2006/09/roasted_beetroo.html


Recipe 2:

6 unpeeled beets
3 medium unpeeled red onions
4 unpeeled whole garlic cloves
sprigs of thyme
4 tbsp olive oil
For the glaze
chicken stock
2 tbsp balsamic vinegar
salt and freshly ground black pepper

1. Preheat the oven to 180C/360F/Gas 4.
2. Place the beetroot, red onions, garlic, sprigs of thyme and olive oil in a medium-sized roasting tray making sure that the vegetables are well coated in olive oil.
3. Roast for an hour and a half, until the beetroot feels tender. Peel and slice the cooked vegetables and put to one side.
4. To make the glaze, place the roasting tray on a medium hob flame and deglaze by adding approximately two tablespoons of chicken stock, the balsamic vinegar and a teaspoon of chopped thyme
5. Bring this to the boil making sure to stir until the liquid has reduced to a syrupy consistency. Season.
6. Arrange the beetroot, red onions and garlic neatly on a warmed serving dish and cover in the glaze. Serve immediately.

http://www.bbc.co.uk/food/recipes/database/roastbeetroot_72797.shtml

Recipe 3:

Banish all thoughts of vinegared beetroot from your mind. Roasted beetroot is mellow and delicious, and can be cooked an hour or so before the guests arrive.

8-10 tennis ball-sized fresh beetroots, ideally red and yellow (golden), cut into quarters

2 tbsp olive oil

1 tbsp fresh thyme leaves

  • Pre-heat the oven to 375F/190C/gas mark 5.
  • Toss the beetroot wedges with the olive oil, thyme leaves and salt and pepper, so that they are well coated. Tip them into a shallow roasting tin. Roast for about 40-45 minutes until they are charred around the edges and tender.
  • Serve warm (not hot) or cooled to room temperature.
  • Aga directions: prepare the beetroot as above, and hang the roasting tin on the second set of runners in the roasting oven. Cook for 15-20 minutes until the beetroot wedges are charred around the edges and tender.

http://www.telegraph.co.uk/foodanddrink/recipes/5195742/Roasted-beetroot-recipe.html


Sunday, 23 August 2009

Elderberry and Apple Jam experiment


To-ing and fro-ing The Hut (our office which was a chicken/pig house once upon a time)I pass an elder bush/tree. It is laden with elder berries. Up early one morning, and it was time to be bold and do a bit of wild foody-ing. Being of the thinking that produce bought from a supermarket or a market is viable food, and that if something is grown from a seed packet which looks the same as the photo or drawing on the packet then that is OK to eat as well, I have a natural nervousness about eating food from the wild. Now I know that the elder is not exactly growing wild, but it is still not an organised type of food. Last year I managed to avoid the elder berry project. This year I couldn't. Time to be bold and take one more step with wild foody-ing type self sufficiency.

I cut the umbrells of elderberries off, and weighed them. I didn't want to be greedy and take more than my needs. Wild foody-ing is about being aware that everything else is needing the food as well, like the birds, wasps, ants, etc, so all I was going to take was the quantity that I needed, and nothing more:


I separated the elderberries from the stalks by using a fork thus:


Then put them into a bowl of water. The unripe berries floated to the top:


All prepped. I had already found an easy recipe in Marguerite Patten's Jams, Preserves and Chutneys, (ISBN 1-902304-72-1, and my instinct told me to head for Elderberry and Apple Jam rather than just Elderberry Jam:

1lb (450g) Cooking Apples (weight when peeled and cored)
3 tablespoons of water
1lb (450g) Elderberries
2lb (900g) Sugar (I used preserving sugar)
2 tablespoons Lemon Juice (I put the juice from 1 lemon in)

As you can see, an easy recipe.

1) Cube apples into small pieces, and into pan with the water. Simmer for 10 minutes.
2) Add elderberries, continue cooking until soft. Actually I neglected to read the cooking method, and put the elderberries and apples in all together. It didn't seem to make much difference.
3) Add sugar and lemon juice, stir over low heat until the sugar has dissolved then boil rapidly until setting point is reached.
Well, did just that, and did a setting test within a couple of minutes. Now my method for testing for set is to take the pot of jam off the heat, stir a large long handled spoon round in the jam so that it is well coated, then go outside, wave the spoon about a bit so it cools down rapidly, and if the jam is set it will hang in a nice blob from the spoon.

The jam did that, much to my surprise. Wow, I thought. This is easy. Not like the marrow and ginger jam I made the other day which never did set properly but made a gorgeous syrupy compot that is great for putting over the surface of a cake just out of the oven, so is still usable.

So I decanted the jam from the pot into the warm jars, and sealed them down, with a half a jar left over for testing for taste.

It never set. ***** I thought. Tasted OK though, like the apple and blackberry jam my Mum made when I was young.

Ten days later, and I had a window of opportunity to address the four pots of jam and sort their contents out. Back into the pan the non-set jam went, to be boiled for about 7 - 10 minutes. This time it has set.

Things I have learnt: That testing for set on a backing hot summer day by waving a spoon about is not going to give an accurate result, mainly because the sun will bake the jam onto the spoon before the jam has time to run off.
That jam is easy to make: if it doesn't set and stays runny just pop it back into the pan and give it another boil through. Even if there is a time gap of several days this still seems to work.
That I am pleased that I have taken another step towards wild foody-ing!

Friday, 21 August 2009

Tomato Chutneying


This is posted on request from Val up in the Charente. In compliance with Foody-ing, whereby all recipes have to be simple, this is simplicity itself, and helped rearrange my thinking about chutneys after a lifetime of avoiding them, in particular the home made variety which always looked like brown sludge to me and mostly tasted the same.

This is 'borrowed' from 'Jams, Preserves and Chutneys' by Marguerite Patten, ISBN number 1-902304-72-1.

1) 2lb (900g) Tomatoes, redly ripe: First task is to peel them: Put them in a large bowl. Cover with boiling water. Leave for ten minutes or so. Pick one up. With a sharpish knife make a couple of vertical slices skin-deep from top to bottom. The skin can then be peeled off quite easily. Remove the inner core if it looks hard and unfriendly, and anything else about the tomato which doesn't look quite right to you.

All of this task I did over the saucepan I was going to cook the chutney in. Not having a preserving pan at this time, I use a large stainless steel saucepan which does the job very well. By prepping the tomatoes over the saucepan rather than over a cutting board or somesuch very drop of juice falls into the pan, hence no waste!

Chomp the toms into smaller pieces, again in your hands. It goes without saying that you should be careful not to cut yourself with the knife if you are using one! I just plunged my hands into the tomatoes and massaged them into pieces which I found to be quite a pleasant experience!

2) 1lb (450g)Apples- this is weight after preparation: The recipe says cooking apples, but I can't get them here in France, so I used Granny Smiths, which stayed firm during cooking.

Peel and core the apples, then cube them. The recipe also says you can grate them, but I haven't tried doing that yet. I suppose that by grating them the chutney would turn out to be finer in texture. But I avoid my grater if at all possible because of my tendency to grate my fingernails off as well!


3) 1lb (450g) Onions: Peeled and sliced. Here the recipe mentions that the onions should be 'finely sliced' but that requires more effort on my part so I get them down to quite a fine dice, then stop.

4) 3/4 pint (450ml) malt or wine vinegar: We can't get malt vinegar here, so red wine vinegar had to suffice.

5) All the above now into your pot. Onto the heat. Get the mix heated up, then simmer until the ingredients are cooked to your liking. I never over cook things, well not intentionally that is (and this only when I get diverted by other activities which come along to distract me) so I cooked the mix for about ten minutes.

To stop it from reducing, I covered the pot with a saucepan lid. I don't know if you should or shouldn't do that, but with my tendency to wander off to do other things, having a lid on helps stop whatever is in the saucepan from boiling dry. This works most times.

6) Now add:
1/2 to 1 teaspoon of ground ginger.
1/2 to 1 teaspoon of mixed spice. Didn't have this, so used Allspice instead.
12 oz (350g) sugar. Any sort I think will do. Might try brown next time.
10oz (300g) sultanas (seedless light raisins).
Salt and pepper to taste.

7) Stirring everything in the pot, making sure the sugar dissoves, bring to the boil. Then simmer 'to the consistency of a thick jam'. A bit daunting this on the first chutney run, as I am used to trying to get things to reach setting point. You don't do this with chutney apparently, so I just kept stirring occassionally until the mix dragged the long handled spoon I was stirring it with. It didn't take long, about five minutes or so. I would think you could get any consistency you like depending on how long you are going to keep it cooking for: the longer you cook the drier will be the chutney.


8) Meanwhile, you can get your jam jars ready. There are various ways of prepping jars, but since I am living in a caravan at the moment and facilities are to more than somewhat basic, all I do is put the jars into a large bowl, pour boiling water into them, then into the bowl. When I need to start filling the jars, I take one out, wipe it dry inside and out, carefully because the glass is hot, then I fill it. Perhaps when I actually do have a proper kitchen I might prep the jars better, but this has to do at the moment.

9) 'Spoon into jars and seal down': I used a jug to pour the mix into the jars, then sealed the tops of the jars with jam jar covers, putting the lid of the jar on top of that. Presumable if you don't have a lid the jam jar cover will do. Also, I remember reading somewhere that you can't use metal lids because the vinegar in the recipe will rust the lid.

10) All done! Now all you have to do is clear up the mess, and leave your newly made chutney alone for a month. This I found hard to do, so I spooned my way through one pot, donated one pot to a dear lady who gave me a dead chicken to cook, then put the others away so I couldn't see them. This chutney is more-ish. I hope you find it the same.


And donating you a pot: The large pieces are the sultanas, and the colour is golden brown, not sludgy!


I read somewhere else that if you are going to give samples of your chutney, jams, etc, away to friends, then to make sure that you actually do keep some of what you have produced for yourself it is a good idea to fill small pots for your friends, and large pots for you. This I did. They are glass yoghurt pots, and work wonderfully well.


Wednesday, 29 July 2009

Val's Curry Powder


And in the post this parcel arrived. Contained therein was a present pour moi: proper homemade curry powder! Curtesy of Val up in the Charente.


After bewailing the dire situation of not being able to make a reasonable pot of curry in France because the available curry powder is of only one type, and that is insipid, Val sent me down this parcel.

And here be two packets of homemade curry powder: one is chilli-hot and she has written a warning to this effect on the packet. And, bless her, she has also enclosed the recipe. So I thought I would share it with you. Will let you know what it tastes like when I next make a curry, but it smells obligingly hot and spicy, and that is through a sealed packet!


Val's Recipe:

The following is 6 teaspoons each:

Coriander
Cumin
Garam Masala
Ginger
Turmeric
Garlic granules

Then you need to add only 2, repeat TWO of the next:

Chilli powder
Cayenne

I guess you mix it all up in a pot, and then store in a dry and sealed environment.

Will let you know how I get on with it! But will have to be sparing with my donated supplies, because I doubt I can obtain the necessary ingredients here. Of course, I could always try ordering over the Internet! Will let you know how I get on with that as well, when the time comes for me to shopping for spices over the 'net.

I close off with Val's sign off: "Hope you like it, and good cooking". (There are updates below photo).


02.08.09 First try of curry and it was gorgeous. As per instructions from Val I was careful with the amount I used, and when first eaten the taste of curry was quite mild, almost hesitant. On being left for a few hours, the taste matured and the flavours sprang out more. It was fab!
10.08.09 Val said that the curry needs to be put into a sealed glass jar. Keeping it in a plastic packet is likely to make the curry powder absorb the taste of plastic.
She also said that this is an authentic recipe, given to her by an Indian gentleman. Well done that man! Apparently they always make their own curry spice mix, and this is his.

Friday, 17 July 2009

Marrow Ginger jam


Oh yummy yums. Had to share this recipe with you although there is room for improvement in my making of it. It's taken from 'What will I do with all those courgettes?' by Elaine Borish. ISBN 0952488159

This is my first year of the courgette experience and already I have been caught out by a couple of specimens which seem to have gone at a mighty gallop of growth. So, a quick look through this book and I found the jam recipe.

You need:
4lbs (2kg) peeled, seeded, then cubed, marrow.
3lbs (1 1/2 kg) Preserving sugar
1oz (30g) root ginger. Crushed. I did this by first peeling the ginger, then putting it into a plastic bag before bashing it with Hub's hammer. And perhaps wiser to put a cloth in between the hammer and the bag. I didn't and I got a squelch as a result when the bag burst open. But ginger is easy to scoop back together, unless you are bashing the bag with a hammer on the ground outside. Then you will have to be careful of gathering up any other detritus with your squashed ginger. The hammer cleaned up quite easily though.
3 large lemons, thinly peeled rind and juice. I couldn't peel my lemons, so I used a gadget which gives the peel a grated texture.
You will also need: A thick bottomed saucepan, a large spoon, and endless patience. This is quite a long winded jamming experience. Plus you will need a muslin bag to put the ginger in, and the lemon peel. I didn't have a muslin bag so I cut a circle out of an old piece of voile, put the ginger in the centre of it, then brought all the edges together, fixing them firmly into place with an elastic band. The recipe says put the lemon peel in as well, but I thought I would save the lemon gratings and pop them in to add extra texture later on.

1) Put marrow pieces in bowl with one third of the sugar, and leave to stand overnight. Haven't the faintest idea why one should do this, but did as instructed.

2) Into saucepan goes everything. Bring to the boil slowly, making sure the sugar is dissolved.
3) Continue to boil steadily until marrow looks transparent. Mine never did.
4) Taste after 15 minutes to adjust flavour, removing muslin bag if necessary.
5) Cook until setting point is reached.

Well, I boiled and boiled away for ages, testing frequently but the mixture didn't seem to want to oblige and turn itself into jam.

I originally thought that this was a large pot of jam to be making, but it takes so long to set that it is best to start off with a large quantity of mix because a lot of that is going to evaporate away.

I kept testing the mix, leaving the ginger in for most of the cooking time because it didn't seem to be too invasive to the taste.

I popped in the lemon gratings towards the end, when the ladle I was using to occasionally stir the mix starting dragging as I moved it round the saucepan signalling that things were starting to thicken. I'm not sure whether you should stir boiling jam, but I am cooking on a caravan stove, and can only heat up one side of my saucepan leaving the other side to be off the boil.

Finally, after ages and ages, I decided that it was as set as it was ever likely to be. Denise over at Much Marlarkey Manor had already warned me that her marrow jam took a while to set, and that it was of a consistency which dribbled off her toast. This type of jam has to be eaten with care, since the drip factor is high enough to leave runnels down the chin and from thence onto the bosoms if one has them. Or one's lap, or over one's hand and up one's sleeve, or onto the table, or floor, or dog. This is a messy type of jam, but no less enjoyable.

Anyway, I decanted about four and a half pots, the marrow sitting in suspension quite happily making me believe that the jam would stiffen as it cooled. It didn't.

So onto the Internet to see why this was. No help anywhere, apart from the advice that it would take upwards of two hours at simmer to set. Someone on a forum had fetched up with the same lose jam, and had reboiled it after which it had set. An investigation into my old cookbook gave me the info that the end of season marrow is best for jamming.

So: I jammed a marrow when it was too young. I didn't simmer the jam for long enough, but boiled it instead which risked giving a singed taste to the jam as the sugar got fed up and burnt. And I didn't feel like reboiling it, because the caravan is a very hot place to be making jam in especially if the jam is going to take hours to reach set. The heat from the stove added to the heat from the sun, makes the caravan a place which is needed to be evacuated from.

But: this jammy syrup, which is what I ended up with, is gorgeous. I keep having a swig of it as I pass by, and as I said in my blog today, entitled 'We had a bit of a blowing' (17 July 2009) over on 'Snippets from our smallholding', I am in danger of becoming a marrow and ginger jam junkie. I am going to have to put the pots away in the cupboard, out of sight, otherwise I will keep on dipping my fingers into it to sample the delightful taste.

Lessons I have learnt: That I love ginger.
That lemon bits in jam are superb.
That this is a recipe which has potential.
That one can always clean the kitchen, do a bit of crocheting, file one's nails, and wash the kitchen ceiling while waiting for the jam to reach setting point.
That one can always use this syrupy jam for putting over things, like puddings and yoghurts, or in my case, as a comfort food!


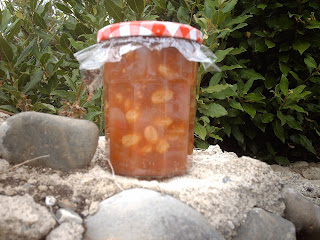
And here's a spare pot of jam for you!

25.07.09. I have been using this jam on the top of cakes, and in rice puddings. The pieces of marrow have now turned gingery in taste, and the stickiness on top of cakes gives an unusual flavour. Drizzle the jam on before the cake goes into the oven, and / or drizzle it once out of the oven.

Monday, 13 July 2009

Jamming: Granulated sugar or Preserving sugar?

"Here's some plums. Do you want to take them to make some jam?" Sara a friend of mine said, as she thrust a bowl of quickly ripening wild plums into my hands, "And here is some sugar as well" she finished off with, handing me a bag of Confisuc sugar.


Since I am living in France, and the sugar was bought from a French supermarket, the bag of sugar was, of course, written in French. I can use lose transation, but decided not to on this occasion, and took pot luck with the normal one to one sugar to fruit recipe.

So on and past the rolling boil stage, and crikey! The jam was set in a matter of minutes!

Onto the next batch of fruit, curtesy of Sara again. This time I used granulated sugar. The fruit took forever to set, and reduced to nearly half the amount of jam that the first batch had made.

'Something wrong here' I thought. Better have an investigation of the Confisuc sugar. A friend was phoned up. "Oh yes," she said, "That's conserving sugar, especially for jams".

I looked on the back of the packet, and did a translation of sorts. She was right. Now in the UK, when undertaking jam making projects, I always used granulated sugar plus a lemon if the recipe said so. Never preserving sugar. My jams were OK, but then I didn't make huge amounts of them and anyway, it was a long time ago. Actually, come to think of it, the likelihood is that preserving sugar wasn't available at the time anyway. As I say, it was a long time ago.

So I go off to the supermarket to buy some of this Confisuc sugar which seems to make jam making a doddle, only to find that it was double the price of the granulated.

Being on a budget I bought the granulated instead, did a bout of jam making only to find that the jam took ages to set and didn't make more that two pots.

A phone call to my friend again. Her response was that she always used the Confisuc / preserving sugar because it saved electricity as it brought the jam to set quicker, and that it made a good amount of jam because the quicker setting time meant that the jam was not boiling for so long and therefore reducing its liquid content as a result. Yes, it was more expensive, but you gor that back in terms of more jam for your money, plus you didn't use so much fuel boiling the jam.

That seemed logical. So my next time of jam making I made a compromise: I used half and half preserving sugar to granulated sugar, but not because I was a skin-flint, but because I had run out of the Confisuc!

Jam OK.

Lessons I learnt: That it is better not to be a skin-flint when it comes to sugars, because the less time one has to deal with a boiling pot of jam the less time is the likelihood of getting singed by the splashing of the jam!
That it is best to keep a store of sugar in the cupboard if one is likely to be donated fruit by kindly neighbours, and that keeping the sugar in a plastic bag tends to confuse the errant ant who is having a recce in one's cupboard for lunch and reduces the possibility of opening the cupboard door later on to find all the ant and its friends all come round for dinner. This only really applies if one is living in a caravan. You're probably OK if you are living in a house.

PS. A conversation with Denise over at Much Marlarkey Manor produced the info that preserving sugar has pectin in it which apparently helps jam to set. Presumably Confisuc has it in as well, but have yet to wade through the writing on the packet to see if it actually does.